문제 페이지를 만들었지만 아직 만들어야할 게 많습니다.
하나 하나 만들어 가도록 하겠습니다.
일단 첫 번째로, 라디오 버튼으로 눌러놓은 값들을 저장할 공간이 있어야 합니다.
라디오 버튼을 기억하고 있다고 하더라도, 그 값을 우리가 알지 못하면 정답을 눌렀는지 어쨌는지 알 수가 없기 때문이죠.
라디오 버튼을 눌렀을 때, 그 값을 전달해주는 방법이 뭐가 있을까요?
input값과 vue의 데이터가 연동이 된다? 네, v-model입니다.
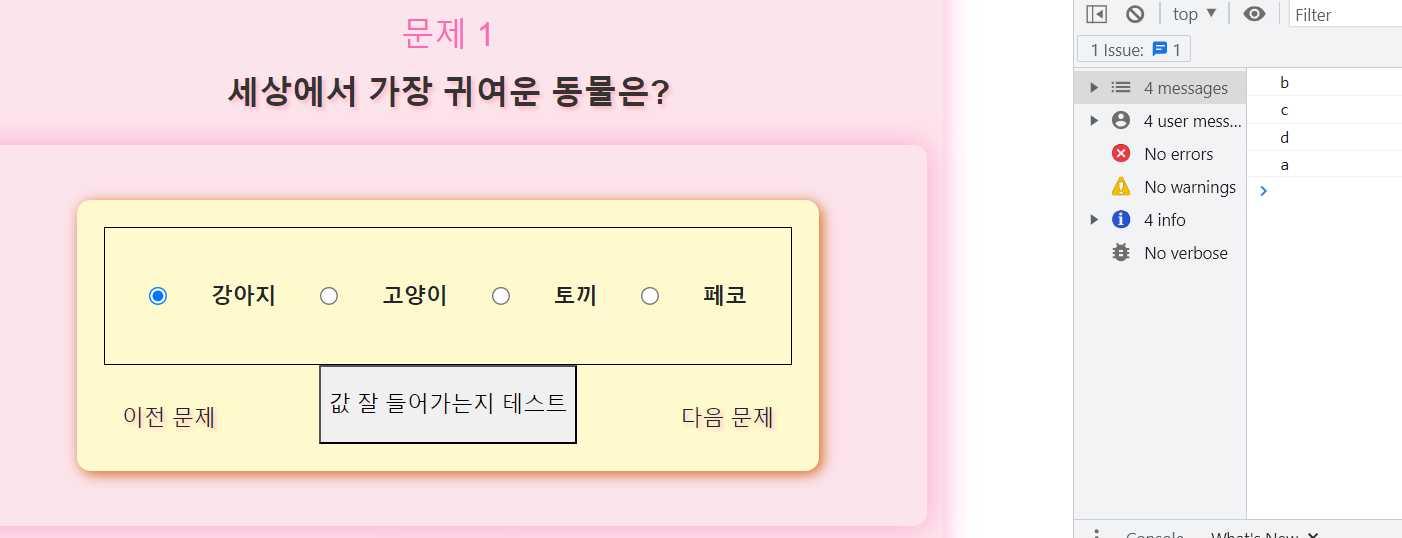
이렇게 input 버튼에 v-model을 달아주면 이 값들이 선택 될 때마다 값이 value값으로 변한다는걸 알 수 있습니다.
테스트를 해보니 값들이 잘 변하고 있네요
그럼 이제 이 받아온 값들을 언제 쏴주면 좋을까요?
selectedAnswer의 값이 변할 때마다 실행되는 함수가 있으면 참 좋을 것 같습니다.
이 selectedAnswer값을 보고 있다가 값이 변하면 실행하는 함수!! watch 속성을 사용하면 어떨까요?
watch 속성을 추가해주도록 하겠습니다.
  watch :{
    selectedAnswer :{
      handler(){
        console.log(this.selectedAnswer)
      }
    }
  }
watch 속성을 추가하고 selectedAnswer를 주목하도록 합니다.
그리고 이 값이 변할 때 handler(){} 함수가 작동을 하게 됩니다.
여기서 함수를 직접 정의하기보다는 methods에 함수를 정의해주고 가져다 사용하는 것이 더욱 나은 방법입니다.

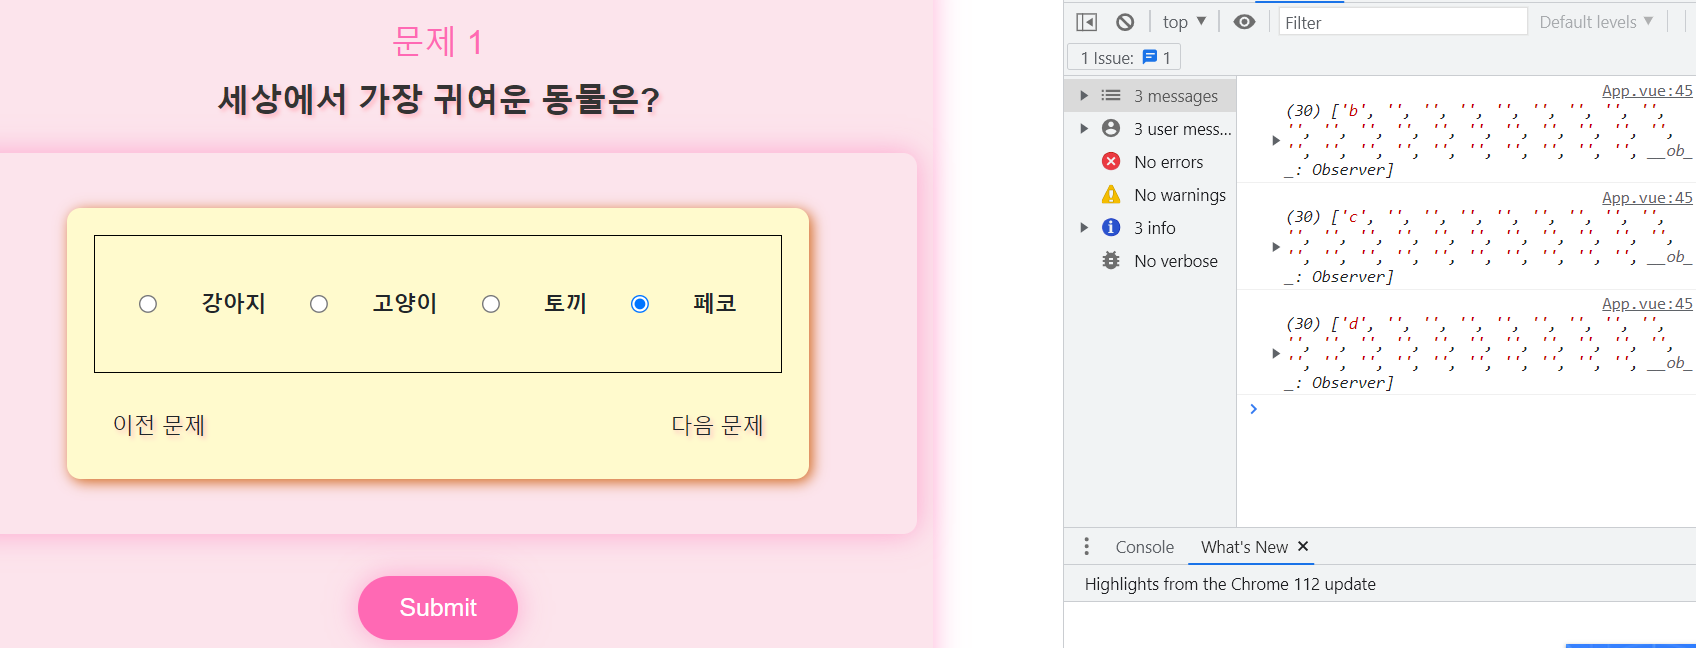
watch 속성을 주니 값이 잘 들어가는지 테스트 하는 버튼을 누르지 않아도 자동으로 들어가는 걸 확인 할 수가 있네요.
자 그럼 이제 이 값을 고른 정답 리스트에 담는 작업을 하도록 합시다.
methods를 하나 만들어줄건데 이건 부모컴포넌트의 고른 정답 리스트에 값을 담아주는 역할을 할겁니다.
부모 컴포넌트에 값을 전달해주려면 다시 emit을 사용하면 됩니다.
이렇게 methods에 함수를 설정해주고 handler안에서 사용해줍니다.
그 다음은 부모 컴포넌트에서 save-answer라는 이벤트로 인덱스와 고른 값을 받은 뒤, 그 값을 이용해 selectedAnswerList에 넣어주면 됩니다.
saveAnswer를 다음과 같이 수정해준뒤, 부모 컴포넌트에서 받아주도록 합니다.
부모 컴포넌트에 selectedAnswerList를 만들고 함수도 실행시켜주고 하면
<template>
  <div id="app" class="container fw-bold">
    <QuestionComponent
      v-for="(i, index) in questionAmount"
      :key="index"
      question="세상에서 가장 귀여운 동물은?"
      :answer="{a:'강아지', b:'고양이', c:'토끼', d:'페코'}"
      :index="index"
      v-show="index == showIndex"
      @next-move="nextMove"
      @prev-move="prevMove"
      @save-answer="saveAnswer"
    />
    <button class="submit-button" @click="submitAnswers">Submit</button>
  </div>
</template>

<script>
import _ from 'lodash'
import QuestionComponent from './components/QuestionComponent.vue';

export default {
  name: 'App',
  data(){
    return {
      questionAmount : _.range(30),
      showIndex : 0,
      selectedAnswerList : new Array(30).fill(''),

    }
  },

  components:{
    QuestionComponent
  },
  methods: {
    nextMove(){
      this.showIndex = this.showIndex+1 > 29 ? 29 : this.showIndex+1
    },
    prevMove(){
      this.showIndex = this.showIndex - 1 < 0 ? 0 : this.showIndex-1
    },
    saveAnswer({index, selectedAnswer}){
      this.selectedAnswerList[index] = selectedAnswer
      console.log(this.selectedAnswerList)
    },
    submitAnswers() {
      // Your logic for submitting answers here
    }

  }
  }

</script>

<style>
#app {
  font-family: Avenir, Helvetica, Arial, sans-serif;
  -webkit-font-smoothing: antialiased;
  -moz-osx-font-smoothing: grayscale;
  text-align: center;
  margin-top: 60px;
}

.container {
  background-color: #fce4ec;
  border-radius: 10px;
  box-shadow: 0 0 20px 0 rgba(255, 105, 180, 0.5);
  padding: 40px;
}

.question-text {
  font-size: 24px;
  color: #333333;
  margin-bottom: 20px;
}

.answer-label {
  font-size: 20px;
  color: #333333;
  margin-bottom: 10px;
}

.answer-input {
  margin-right: 10px;
}

.submit-button {
  background-color: #ff69b4;
  border: none;
  border-radius: 50px;
  color: white;
  font-size: 18px;
  padding: 10px 30px;
  margin-top: 30px;
  box-shadow: 0 0 20px 0 rgba(255, 105, 180, 0.5);
  transition: all 0.3s ease-in-out;
}

.submit-button:hover {
  background-color: #ff94c2;
  box-shadow: 0 0 20px 0 rgba(255, 105, 180, 0.8);
  cursor: pointer;
}
</style>
값을 선택할 때 마다 해당 위치에 선택한 값들이 잘 들어가는 것을 확인할 수 있습니다.
이제 correctAnswerList를 하나 만들어서 대조시켜주면 내가 무슨 문제를 틀렸는지도 바로 알 수 있겠네요!!!
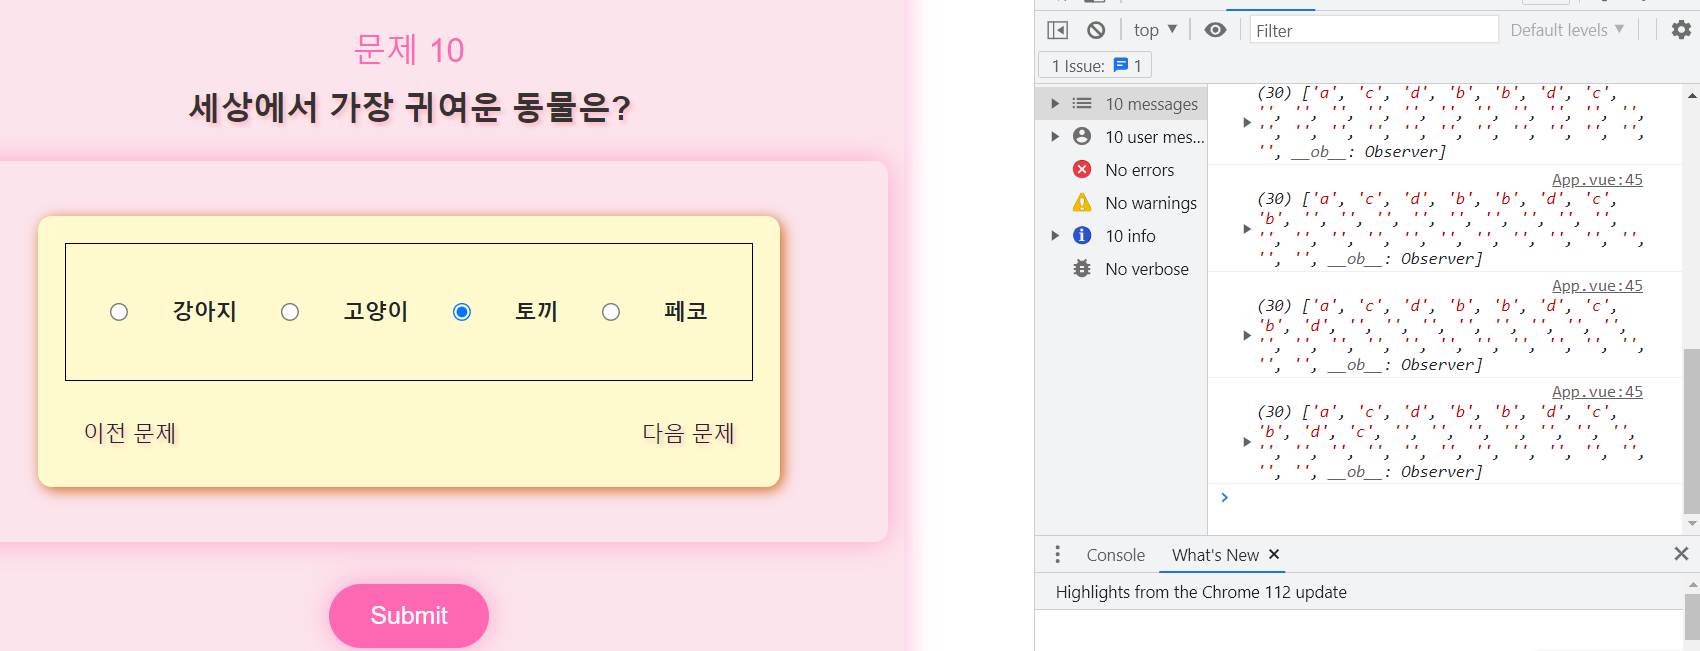
값들이 차곡차곡 잘 쌓이는 것을 알 수 있습니다!!
이제 Submit버튼을 누르면 correctAnswerList와 값을 비교하고 틀린 문제들을 체크해주면 될 것 같습니다.
자 이제 여기까지 왔으니 슬슬 진짜 문제들을 만들어 보도록 합니다.
지금은 문제가 바껴도 매번 같은 문제들만 나오고 있는데, 문제를 옮기면 당연히 문제도 달라지고 답도 달라져야하죠
이제 문제들을 각각 Object로 바꿔주도록 하겠습니다.
여기서 questionAmount로 그냥 문제 개수만큼 반복문을 돌리는 것이 아니라 문제 Object를 순회하면서
question과 answer에 각각 다른 값들을 쏴주겠다 이말입니다
그럼 일단 questionAmount를 questions로 바꾸어야 하겠습니다.
questions로 하나 하나 만들려고 하다 보니 갑자기 30개라는 문제양이 너무 많아보입니다.
5개로 줄이도록 하겠습니다.
data부분을 수정해주도록 하겠습니다.
이런식으로 말이죠. 그리고 컴포넌트에 쏴줄 props도 바꿔주도록 합니다.
이렇게 QuestionComponent도 바꿔줍니다. questionAmount를 도는게 아니라 questions를 돌고
question과 answer는 이제 question 안에 있는 question과 answer를 전달해줄겁니다.
question도 이제 dynmaic props로 바꿔주어야겠죠.
문제 5개를 만들어 놓고 테스트를 해보도록 합니다.
이런식으로 하나 하나 문제들을 수정해주도록 합니다.
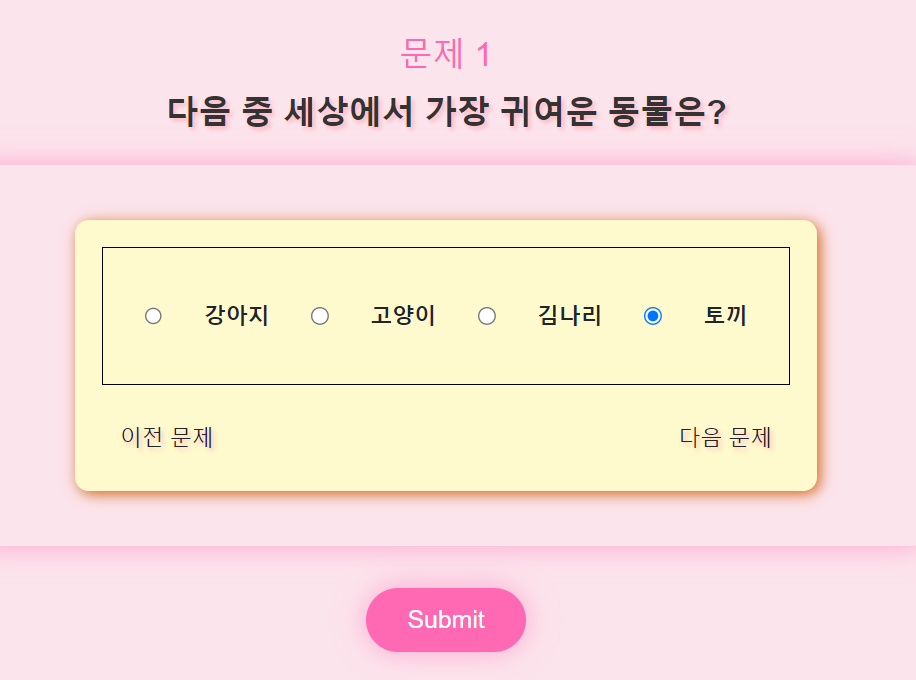


매우 만족스러운 결과가 나왔습니다.
이제 정말 문제를 하나하나 풀어볼 수 있는 페이지가 완성이 되었습니다.
이왕 문제 오브젝트를 만든 김에 각 오브젝트들이 correctAnswer도 가지고 있게 해줍시다.
이런식으로 각자가 correctAnswer까지 가지고 있으면 이후에 정답을 체크하기에 좀 더 수월해질 수 있을 것 같습니다.
selectedAnswerList도 이제 굳이 Array로 여러개 만들지 않고 문제의 개수만큼만 만들어주면 되겠죠
next버튼과 prev버튼을 누를 때 문제 길이 이상으로 넘어가지 못하게 하는 것도 수정해주고 말이죠.
추가로 문제가 바꼈을 때 문제별 정답버튼의 id를 고정시켜버려서
다음 문제부터는 label을 눌러도 라디오 버튼이 클릭이 되지 않기에, :id와 :for으로 동적으로 받아주어 문제를 해결했습니다.
<template>
  <div id="app" class="container fw-bold">
    <QuestionComponent
      v-for="(question, index) in questions"
      :key="index"
      :question="question.question"
      :answer="question.answer"
      :index="index"
      v-show="index == showIndex"
      @next-move="nextMove"
      @prev-move="prevMove"
      @save-answer="saveAnswer"
    />
    <button class="submit-button" @click="submitAnswers">Submit</button>
  </div>
</template>

<script>
import QuestionComponent from './components/QuestionComponent.vue';

export default {
  name: 'App',
  data(){
    return {
      questions :[{
        question : '다음 중 세상에서 가장 귀여운 동물은?',
        answer : {
          a:'강아지',
          b:'고양이',
          c:'김나리',
          d:'토끼',
        },
        correctAnswer : 'c'
      },
      {
        question : '다음 중 가장 맛있는 음료수는??',
        answer : {
          a:'펩시',
          b:'코카콜라',
          c:'웰치스',
          d:'환타',
        },
          correctAnswer : 'a'
      },
      {
        question : '다음 중 가장 재미있는 프로그래밍 언어는?',
        answer : {
          a:'파이썬',
          b:'C',
          c:'Java',
          d:'HTML',
        },
        correctAnswer : 'd'
      },
      {
        question : '다음 중 가장 좋은 계절은?',
        answer : {
          a:'봄',
          b:'여름',
          c:'가을',
          d:'겨울',
        },
        correctAnswer:'b'
      },
      {
        question : '다음 중 가장 맛있는 야식은?',
        answer : {
          a:'치킨',
          b:'피자',
          c:'족발',
          d:'햄버거',
        },
          correctAnswer:'a'
      },
      ],
      showIndex : 0,
      selectedAnswerList : [],


    }
  },


  components:{
    QuestionComponent
  },
  methods: {
    nextMove(){
      this.showIndex = this.showIndex+1 > this.questions.length -1 ? this.questions.length -1 : this.showIndex+1
    },
    prevMove(){
      this.showIndex = this.showIndex - 1 < 0 ? 0 : this.showIndex-1
    },
    saveAnswer({index, selectedAnswer}){
      this.selectedAnswerList[index] = selectedAnswer
      console.log(this.selectedAnswerList)
    },
    submitAnswers() {
      // Your logic for submitting answers here
    }
  },
  created(){
    this.selectedAnswerList = new Array(this.questions.length).fill('')
  }
  }

</script>

<style>
#app {
  font-family: Avenir, Helvetica, Arial, sans-serif;
  -webkit-font-smoothing: antialiased;
  -moz-osx-font-smoothing: grayscale;
  text-align: center;
  margin-top: 60px;
}

.container {
  background-color: #fce4ec;
  border-radius: 10px;
  box-shadow: 0 0 20px 0 rgba(255, 105, 180, 0.5);
  padding: 40px;
}

.question-text {
  font-size: 24px;
  color: #333333;
  margin-bottom: 20px;
}

.answer-label {
  font-size: 20px;
  color: #333333;
  margin-bottom: 10px;
}

.answer-input {
  margin-right: 10px;
}

.submit-button {
  background-color: #ff69b4;
  border: none;
  border-radius: 50px;
  color: white;
  font-size: 18px;
  padding: 10px 30px;
  margin-top: 30px;
  box-shadow: 0 0 20px 0 rgba(255, 105, 180, 0.5);
  transition: all 0.3s ease-in-out;
}

.submit-button:hover {
  background-color: #ff94c2;
  box-shadow: 0 0 20px 0 rgba(255, 105, 180, 0.8);
  cursor: pointer;
}
</style>
<template>
<div>
<div>
<h3 class="question-number">문제 {{index+1}}</h3>
<p class="question-text">{{question}}</p>
</div>
<div class="container d-flex justify-content-center">
<div class="options">
<div class="answerBox d-flex align-items-center justify-content-evenly">
<input type="radio" v-model="selectedAnswer" :name="'answer'+index" value='a' :id="'a'+index"> <label :for="'a'+index">{{ answer.a }}</label>
<input type="radio" v-model="selectedAnswer" :name="'answer'+index" value='b' :id="'b'+index"> <label :for="'b'+index">{{ answer.b }} </label>
<input type="radio" v-model="selectedAnswer" :name="'answer'+index" value='c' :id="'c'+index"> <label :for="'c'+index">{{ answer.c }} </label>
<input type="radio" v-model="selectedAnswer" :name="'answer'+index" value='d' :id="'d'+index"> <label :for="'d'+index">{{ answer.d }} </label>
</div>
<div class="d-flex justify-content-between" style="width:500px;">
<button @click="prevMove" class="btn next-btn">이전 문제</button>
<button @click="nextMove" class="btn prev-btn">다음 문제</button>
</div>
</div>
</div>
</div>
</template>
<script>
export default {
data(){
return {
selectedAnswer:null,
}
},
props:{
question:String,
answer:Object,
index:Number,
},
methods:{
nextMove(){
this.$emit('next-move')
},
prevMove(){
this.$emit('prev-move')
},
saveAnswer(){
this.$emit('save-answer', {index:this.index, selectedAnswer:this.selectedAnswer})
}
},
watch :{
selectedAnswer :{
handler(){
this.saveAnswer()
}
}
}
}
</script>
<style>
.question-number {
color: #FF69B4;
font-size: 24px;
margin-bottom: 10px;
}
.question-text {
color: #4B0082;
font-size: 20px;
margin-bottom: 20px;
text-shadow: 2px 2px 3px #FFB6C1;
}
.options {
background-color: #FFFACD;
border-radius: 10px;
box-shadow: 2px 2px 10px #D2691E;
padding: 20px;
}
.answerBox {
border: 1px solid black;
width: 500px;
height: 100px;
}
.btn {
background-color: #FF69B4;
border: none;
border-radius: 10px;
color: #FFF;
font-size: 16px;
font-weight: bold;
margin-top: 20px;
padding: 10px 20px;
text-shadow: 2px 2px 3px #FFB6C1;
transition: all 0.3s ease-in-out;
}
.btn:hover {
box-shadow: 2px 2px 5px #D2691E;
cursor: pointer;
transform: scale(1.1);
}
</style>
자 다음에는 이제 submit버튼을 눌러 맞춘 정답이 몇개나 되는지를 만들어보도록 하겠습니다
'프론트엔드 > Vue' 카테고리의 다른 글
| Vue로 문제 풀이 페이지 만들어보기 5 + 느낀점 (1) | 2023.05.07 |
|---|---|
| Vue로 문제 풀이 페이지 만들어보기 4 (0) | 2023.05.05 |
| Vue로 문제 풀이 페이지 만들어보기 2 (1) | 2023.05.05 |
| Vue로 문제 풀이 페이지 만들어보기 1 (0) | 2023.05.05 |